Dog Bowl Holder
Background
It is a self-evident truth that every dog deserves to eat, drink, and be happy. It is also true that some dogs are the best, and deserve a bespoke dining station crafted from wood to assist with their eating and drinking habits. I know a dog named Scout that falls into this category.
Unfortunately, dog parents may be uncomfortable, or feel inadequate, if you gift their dog with such a luxury. In order to circumvent this predicament I suggest waiting patiently for one’s friends to choose to get married. Social etiquette dictates that under such circumstances, one should express joy for the union by offering a gift to the newlywed couple. It is at this point, one can utilize the situation as an opportunity to provide the best dog ever a gift, but under the guise of “wedding gift”.
I implemented the above strategy, and Scout wagged her tail, therefore it was a great success.
Design
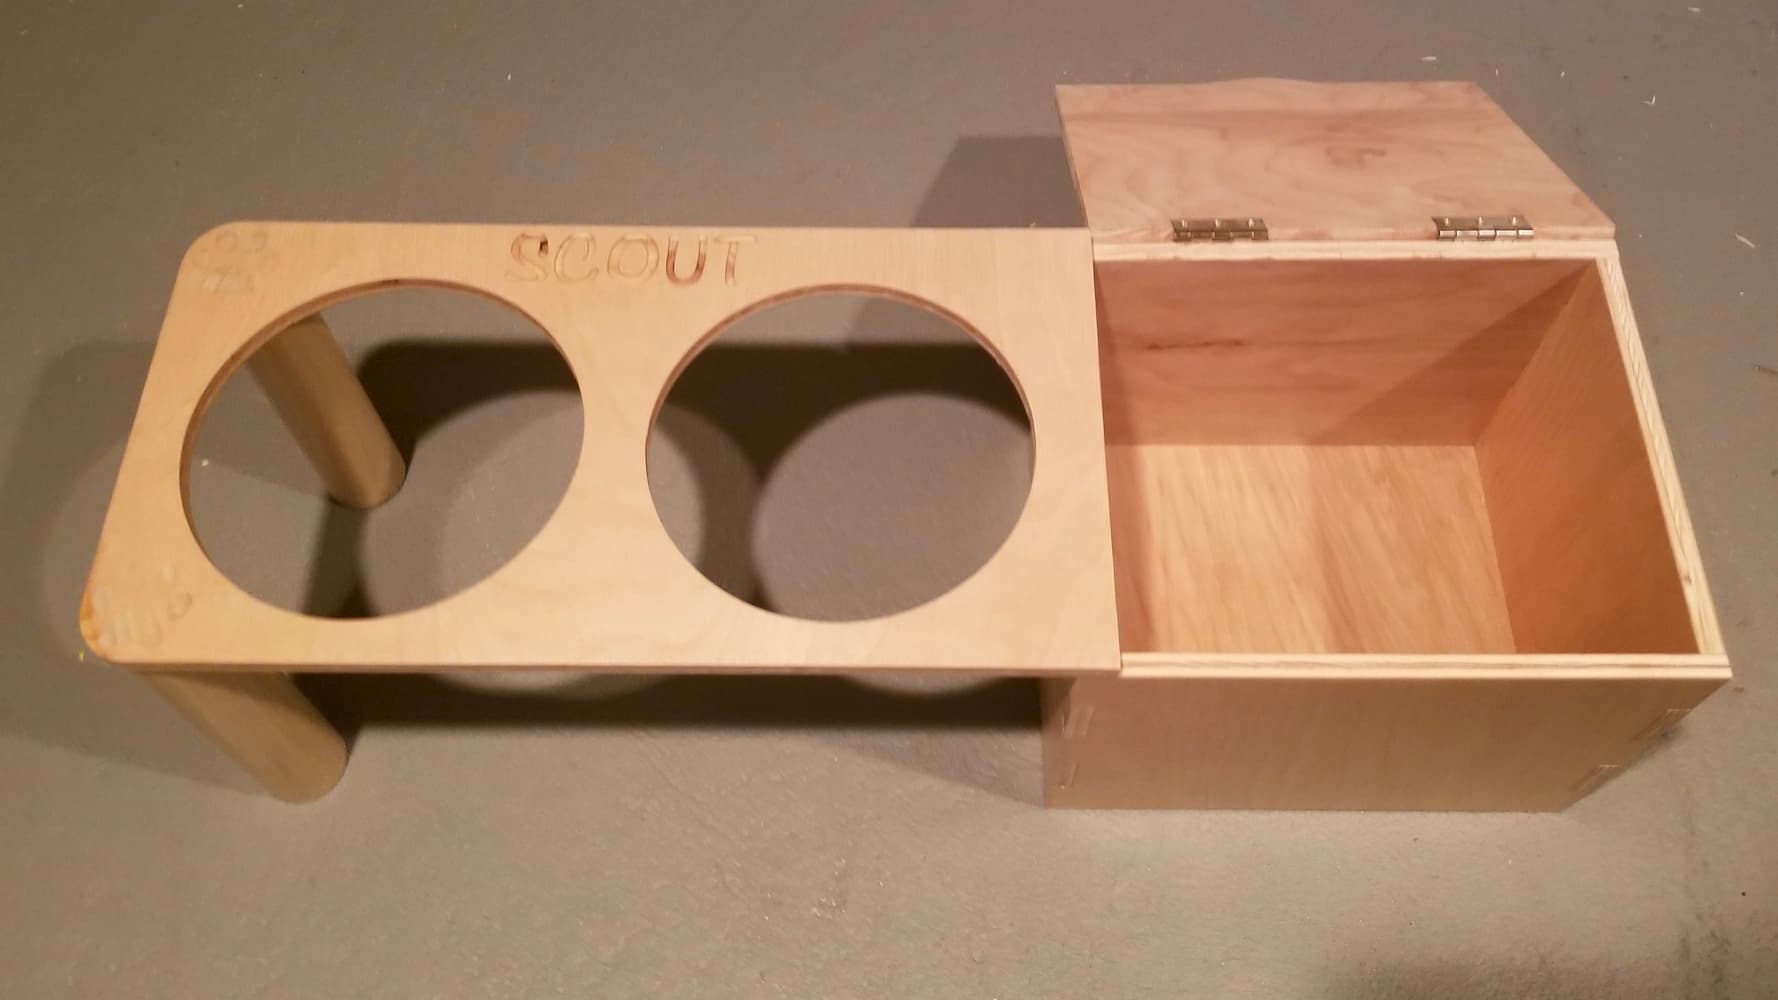
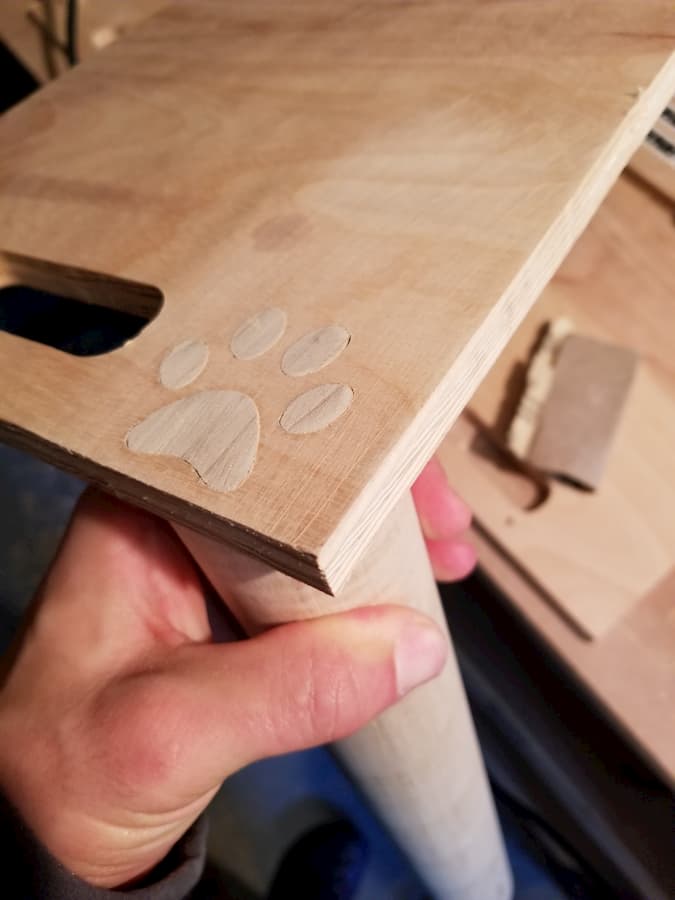
The holder has holes for two bowls. The left side of the holder is supported by two legs that are attached with custom paw-shaped joinery. The right side is supported by a wall of a box that can be used for storing food or toys. The lid of the box has a lip on the front edge to give the user something to lift up on when opening. The design was modeled up using Fusion 360.
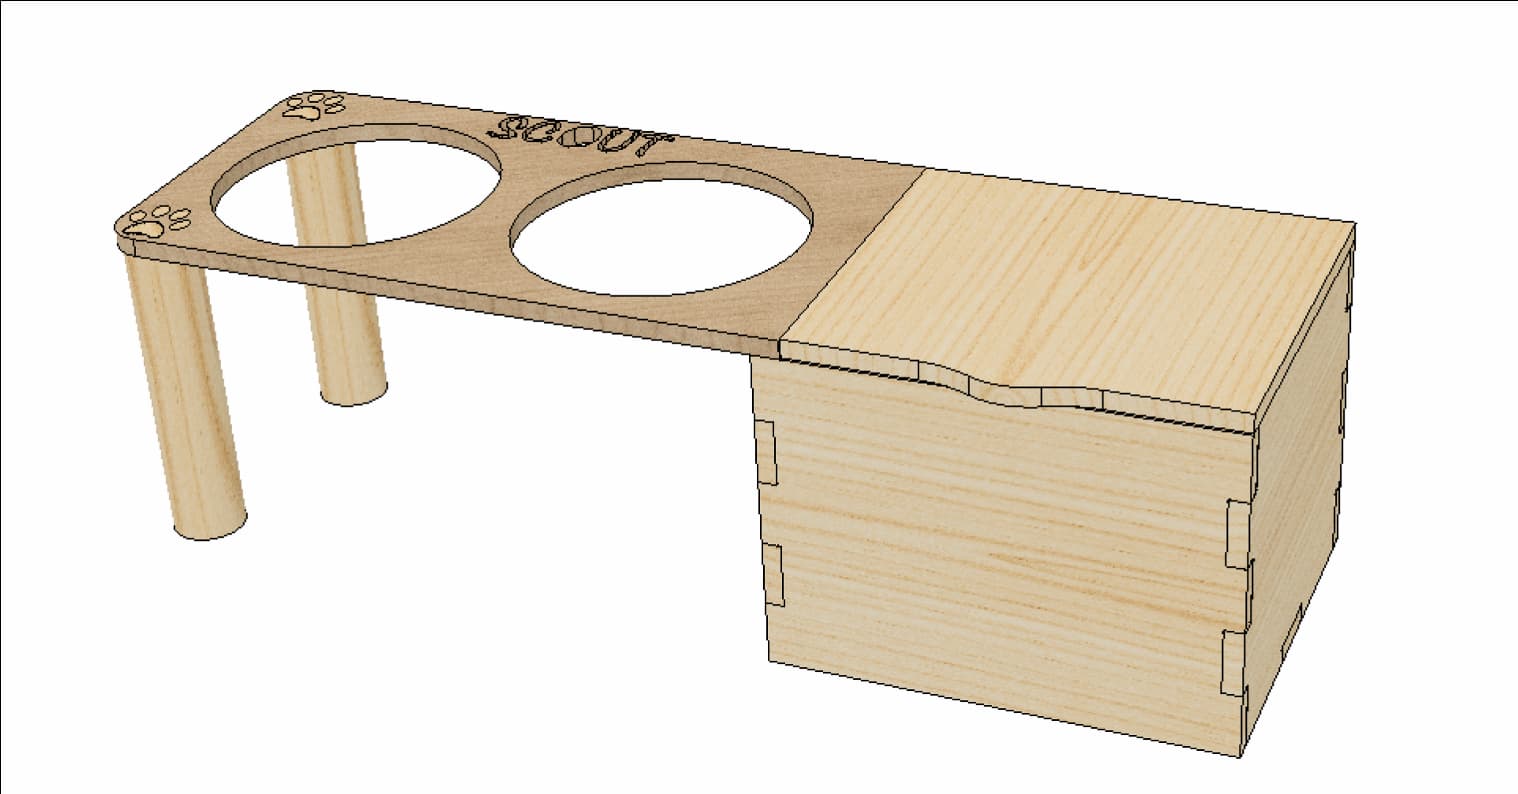
Design with top
Build
The flat panels were cut from 1/2" birch plywood using a handheld CNC router. For the legs, I first built a vertical jig which was subsequently used to cut paw shapes into 2" wooden dowels.
Transferring a photo onto the wood proved to be more difficult than expected. I first tried using polycrylic as the transfer medium like this instructional video, but had poor results (large flakes of ink came off when I went to remove the paper). I ended up having better luck using mod podge as the transfer medium like in this video.
The lid was attached using #4 x 3/8" wood screws and brass hinges. Everything else was press fit and glued together with wood glue. I sanded all the surfaces and added about 3 layers of clear satin polycrylic.
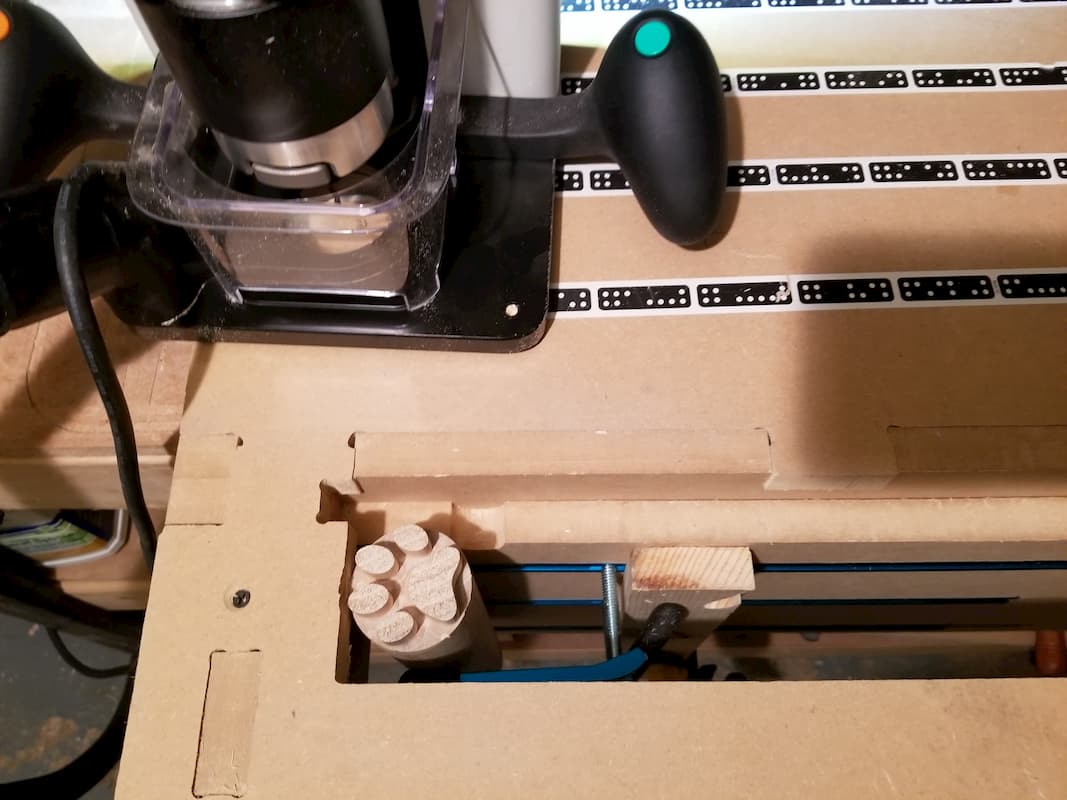
Using vertical jig
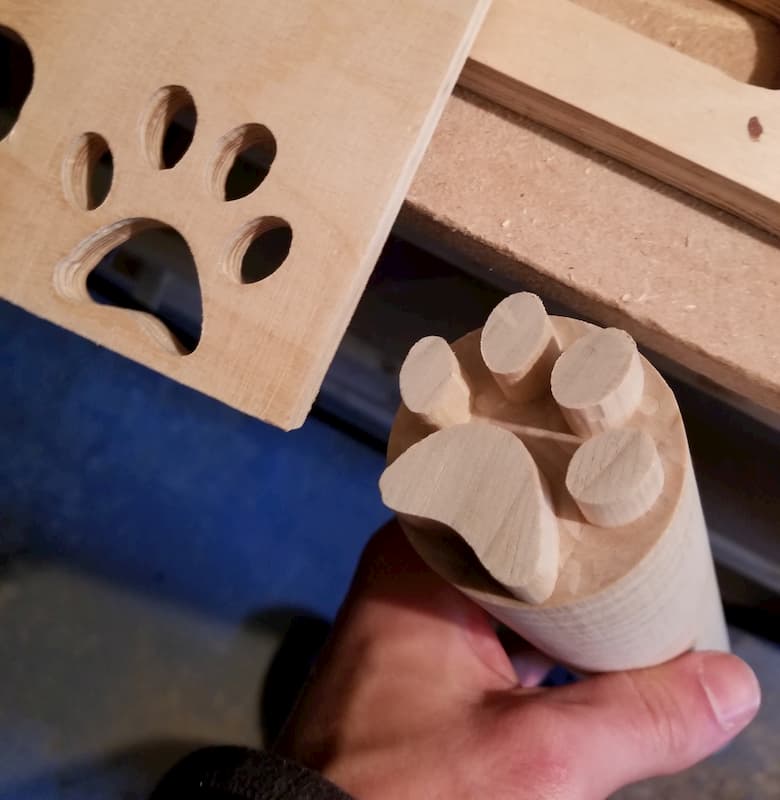
Paw-shaped mortise and tennon
Testing the fit
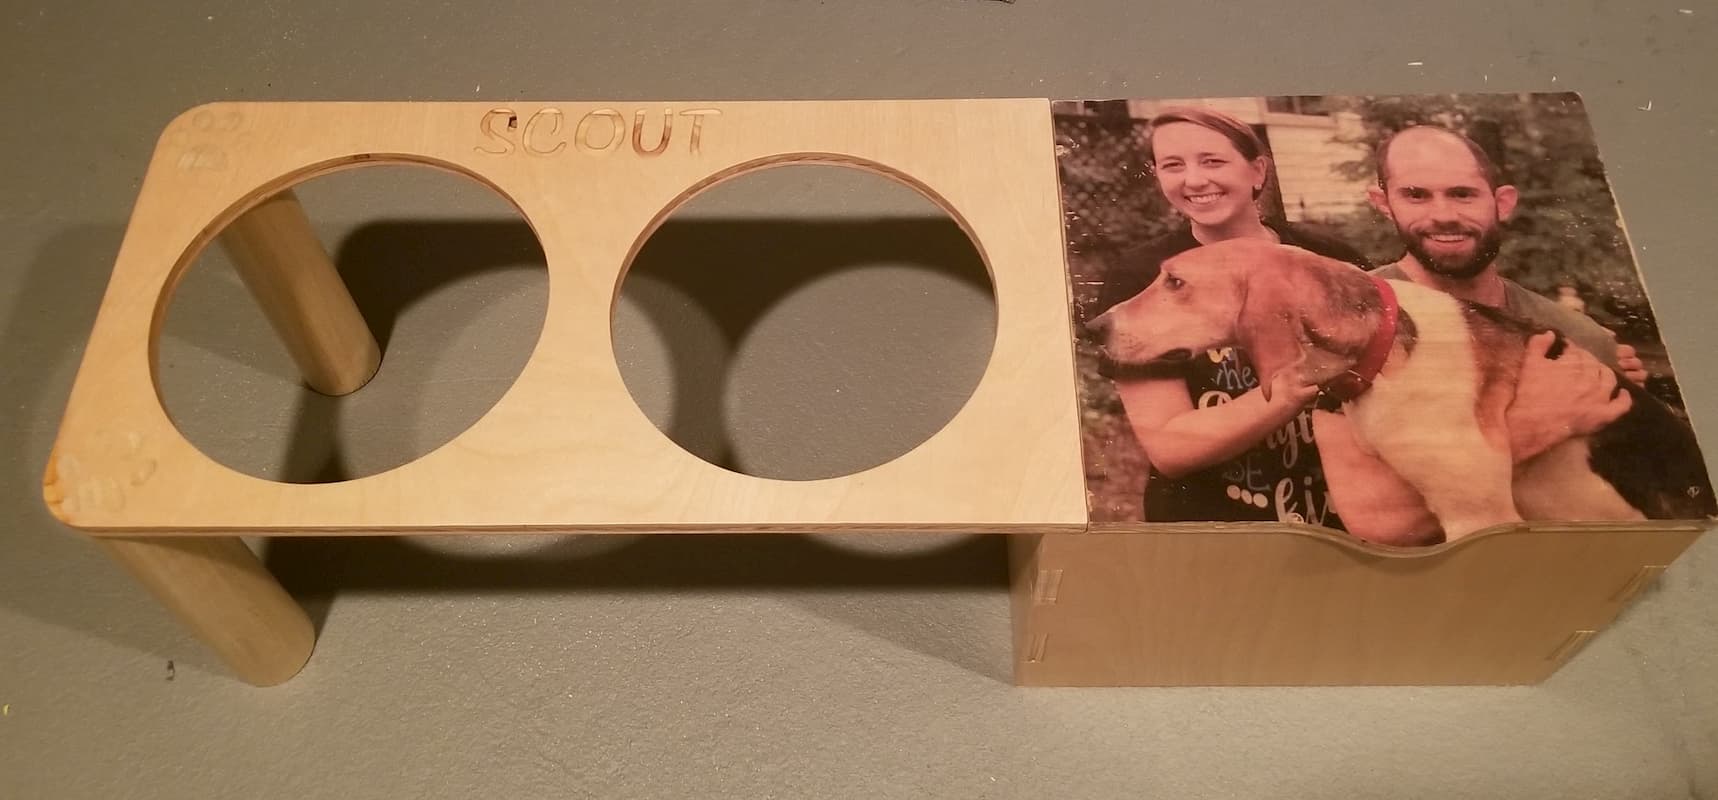
Finished product
← back to projects