Zoom Controller
Background
In 2020, as a consequence of COVID-19, Zoom video conferencing software became a prominent part my life, from work meetings to virtual trivia nights. I was glad to have a way to interact with other people, but no matter how many calls I was on, it never seemed to be a sufficient substitution for in-person interactions.
Conversations would struggle to have normal flow, as pauses due to technical difficulties were inevitable. No one was exempt from the tribulations of being muted/unmuted at the wrong times, fumbling with windows and menus while trying to share their screen, or the classic situation of everyone saying their goodbyes, then awkwardly remaining on screen for the next 5-10 seconds as they tried to virtually exit.
These conversational hiccups were the norm and thus tolerated by everyone, but they were annoyances nonetheless. To combat these annoyances I decided to make a purpose built tool for controlling Zoom, bypassing the need to navigate the overcomplicated software interface.
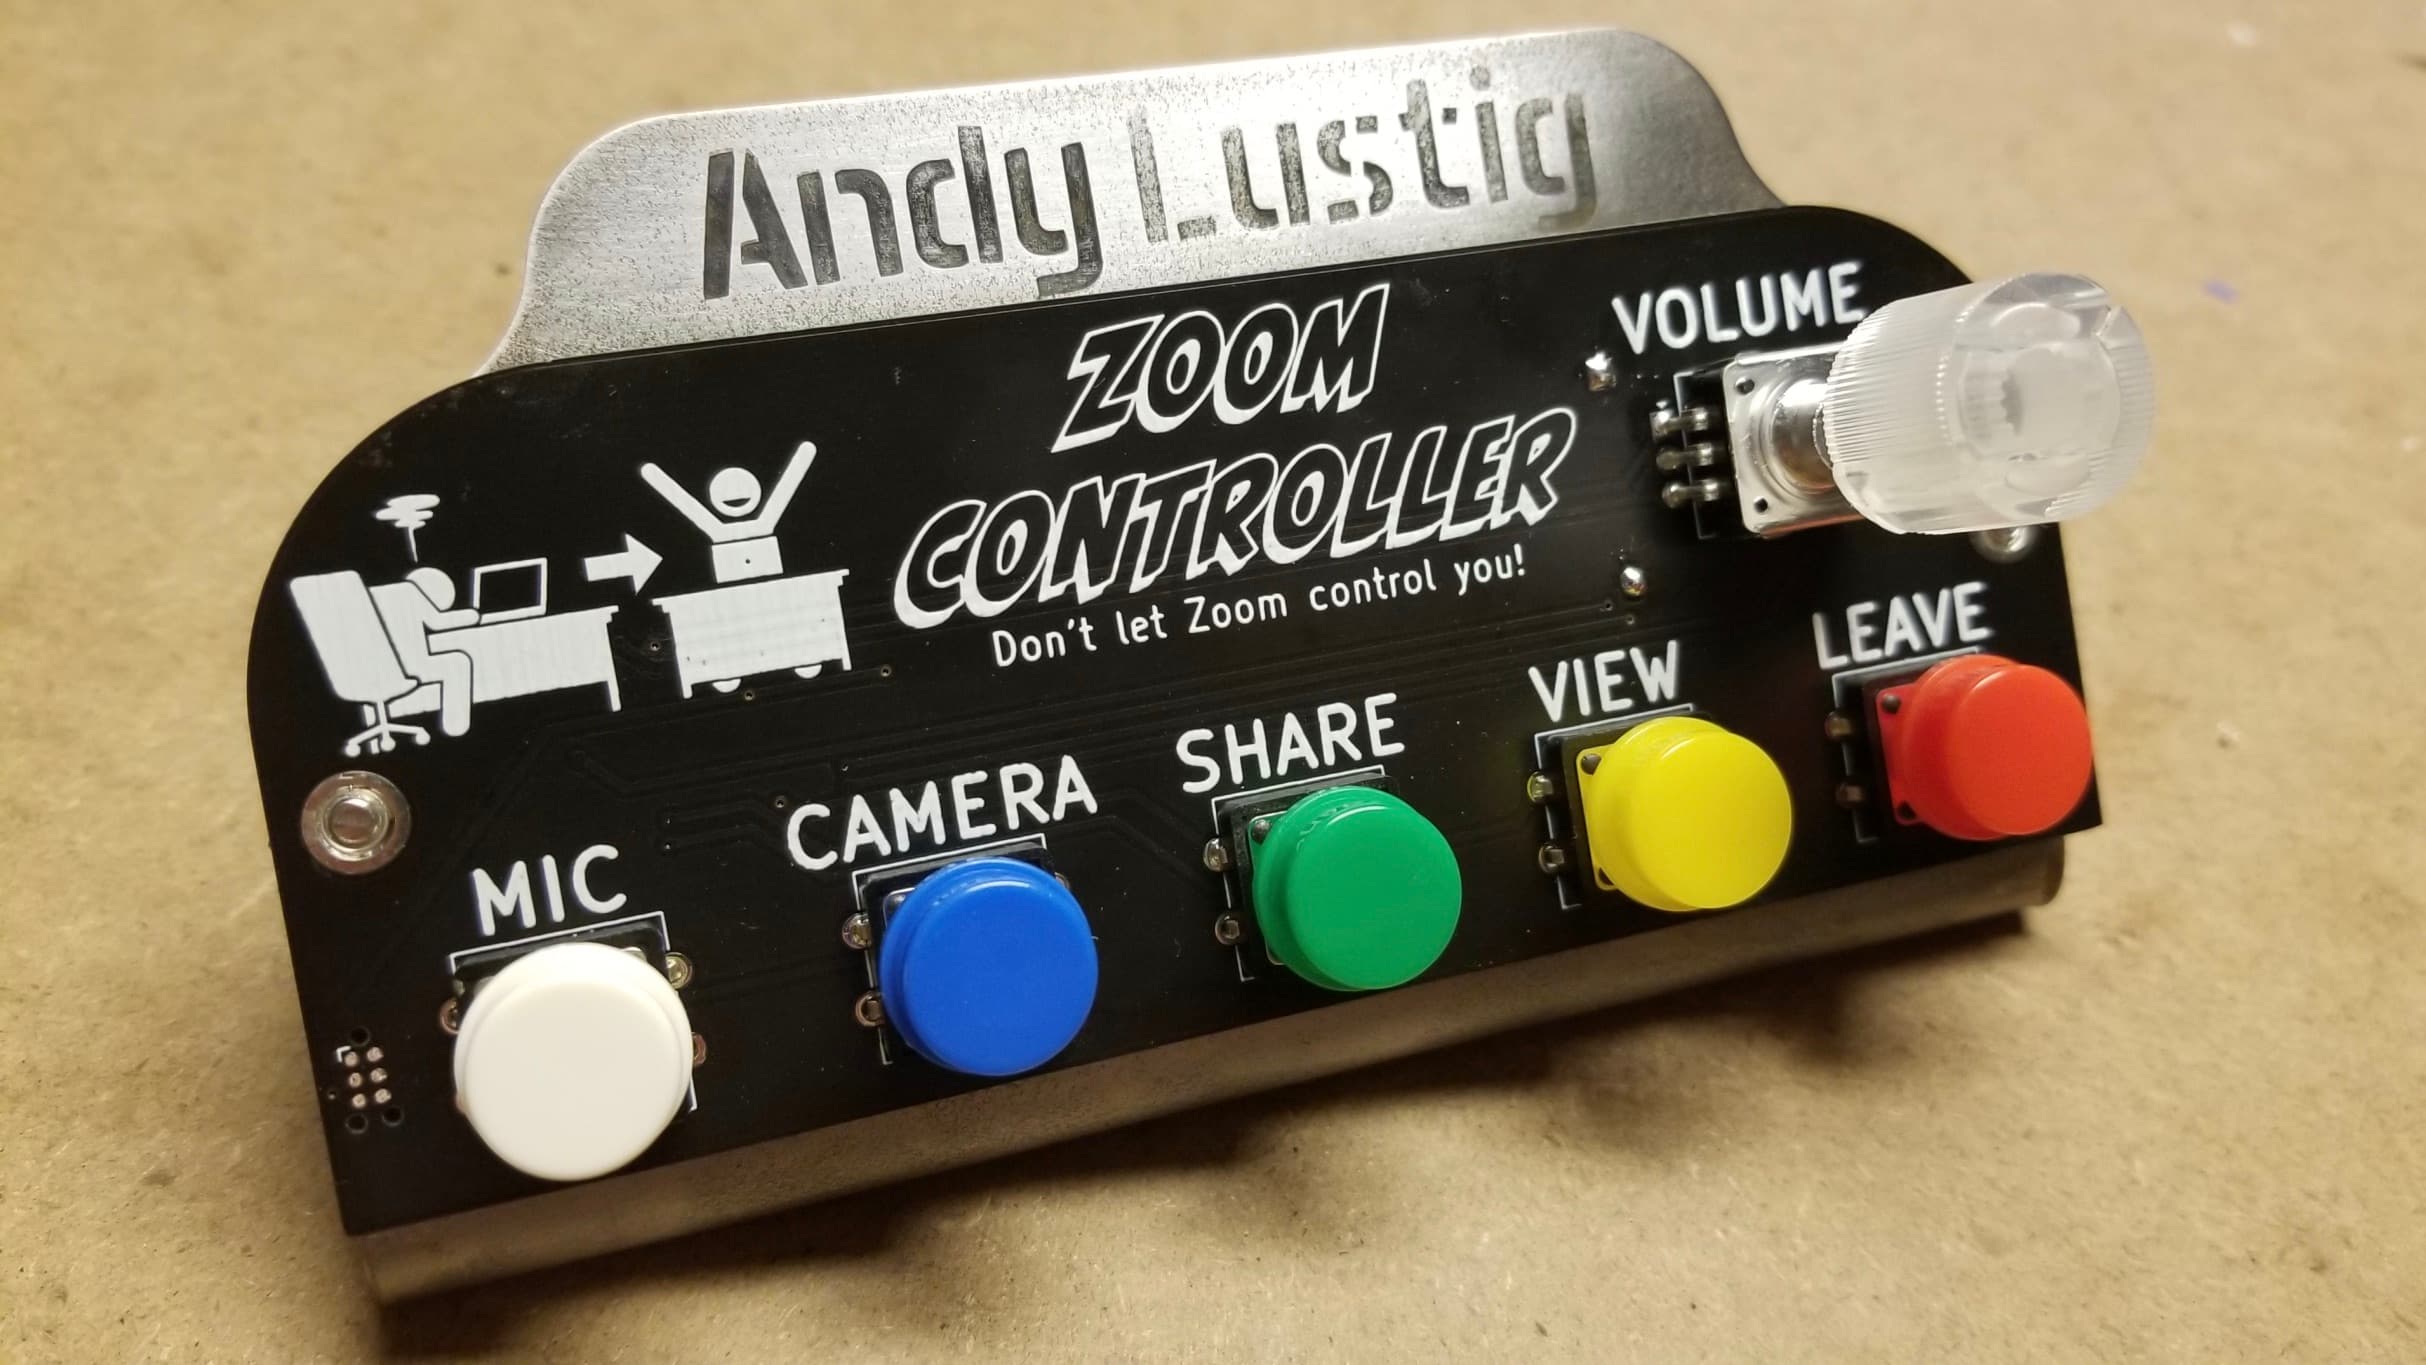
Zoom Controller is a standalone wireless Bluetooth controller that gives quick access to any shortcuts that one may need during a Zoom meeting.
Design
Interface
Zoom functions are mapped to 5 satisfyingly clicky tactile buttons. A variety of colorful caps can be used, making each button easily distinguishable.
An illuminated rotary encoder with included button is used to turn on the controller, indicate the connected state (red for disconnected, green for connected), and provide an interface for adjusting media volume by rotating the knob.
Power
The controller uses two AA batteries that pop into a battery holder mounted on the back. I used a soft-latch circuit based on circuit #3 in this video (featured in this Hackaday article). The nice thing about using a soft latch circuit is that it allows the device to turn itself off. To save battery, the Zoom Controller will turn itself off if it is idle for 30 minutes.
Stand
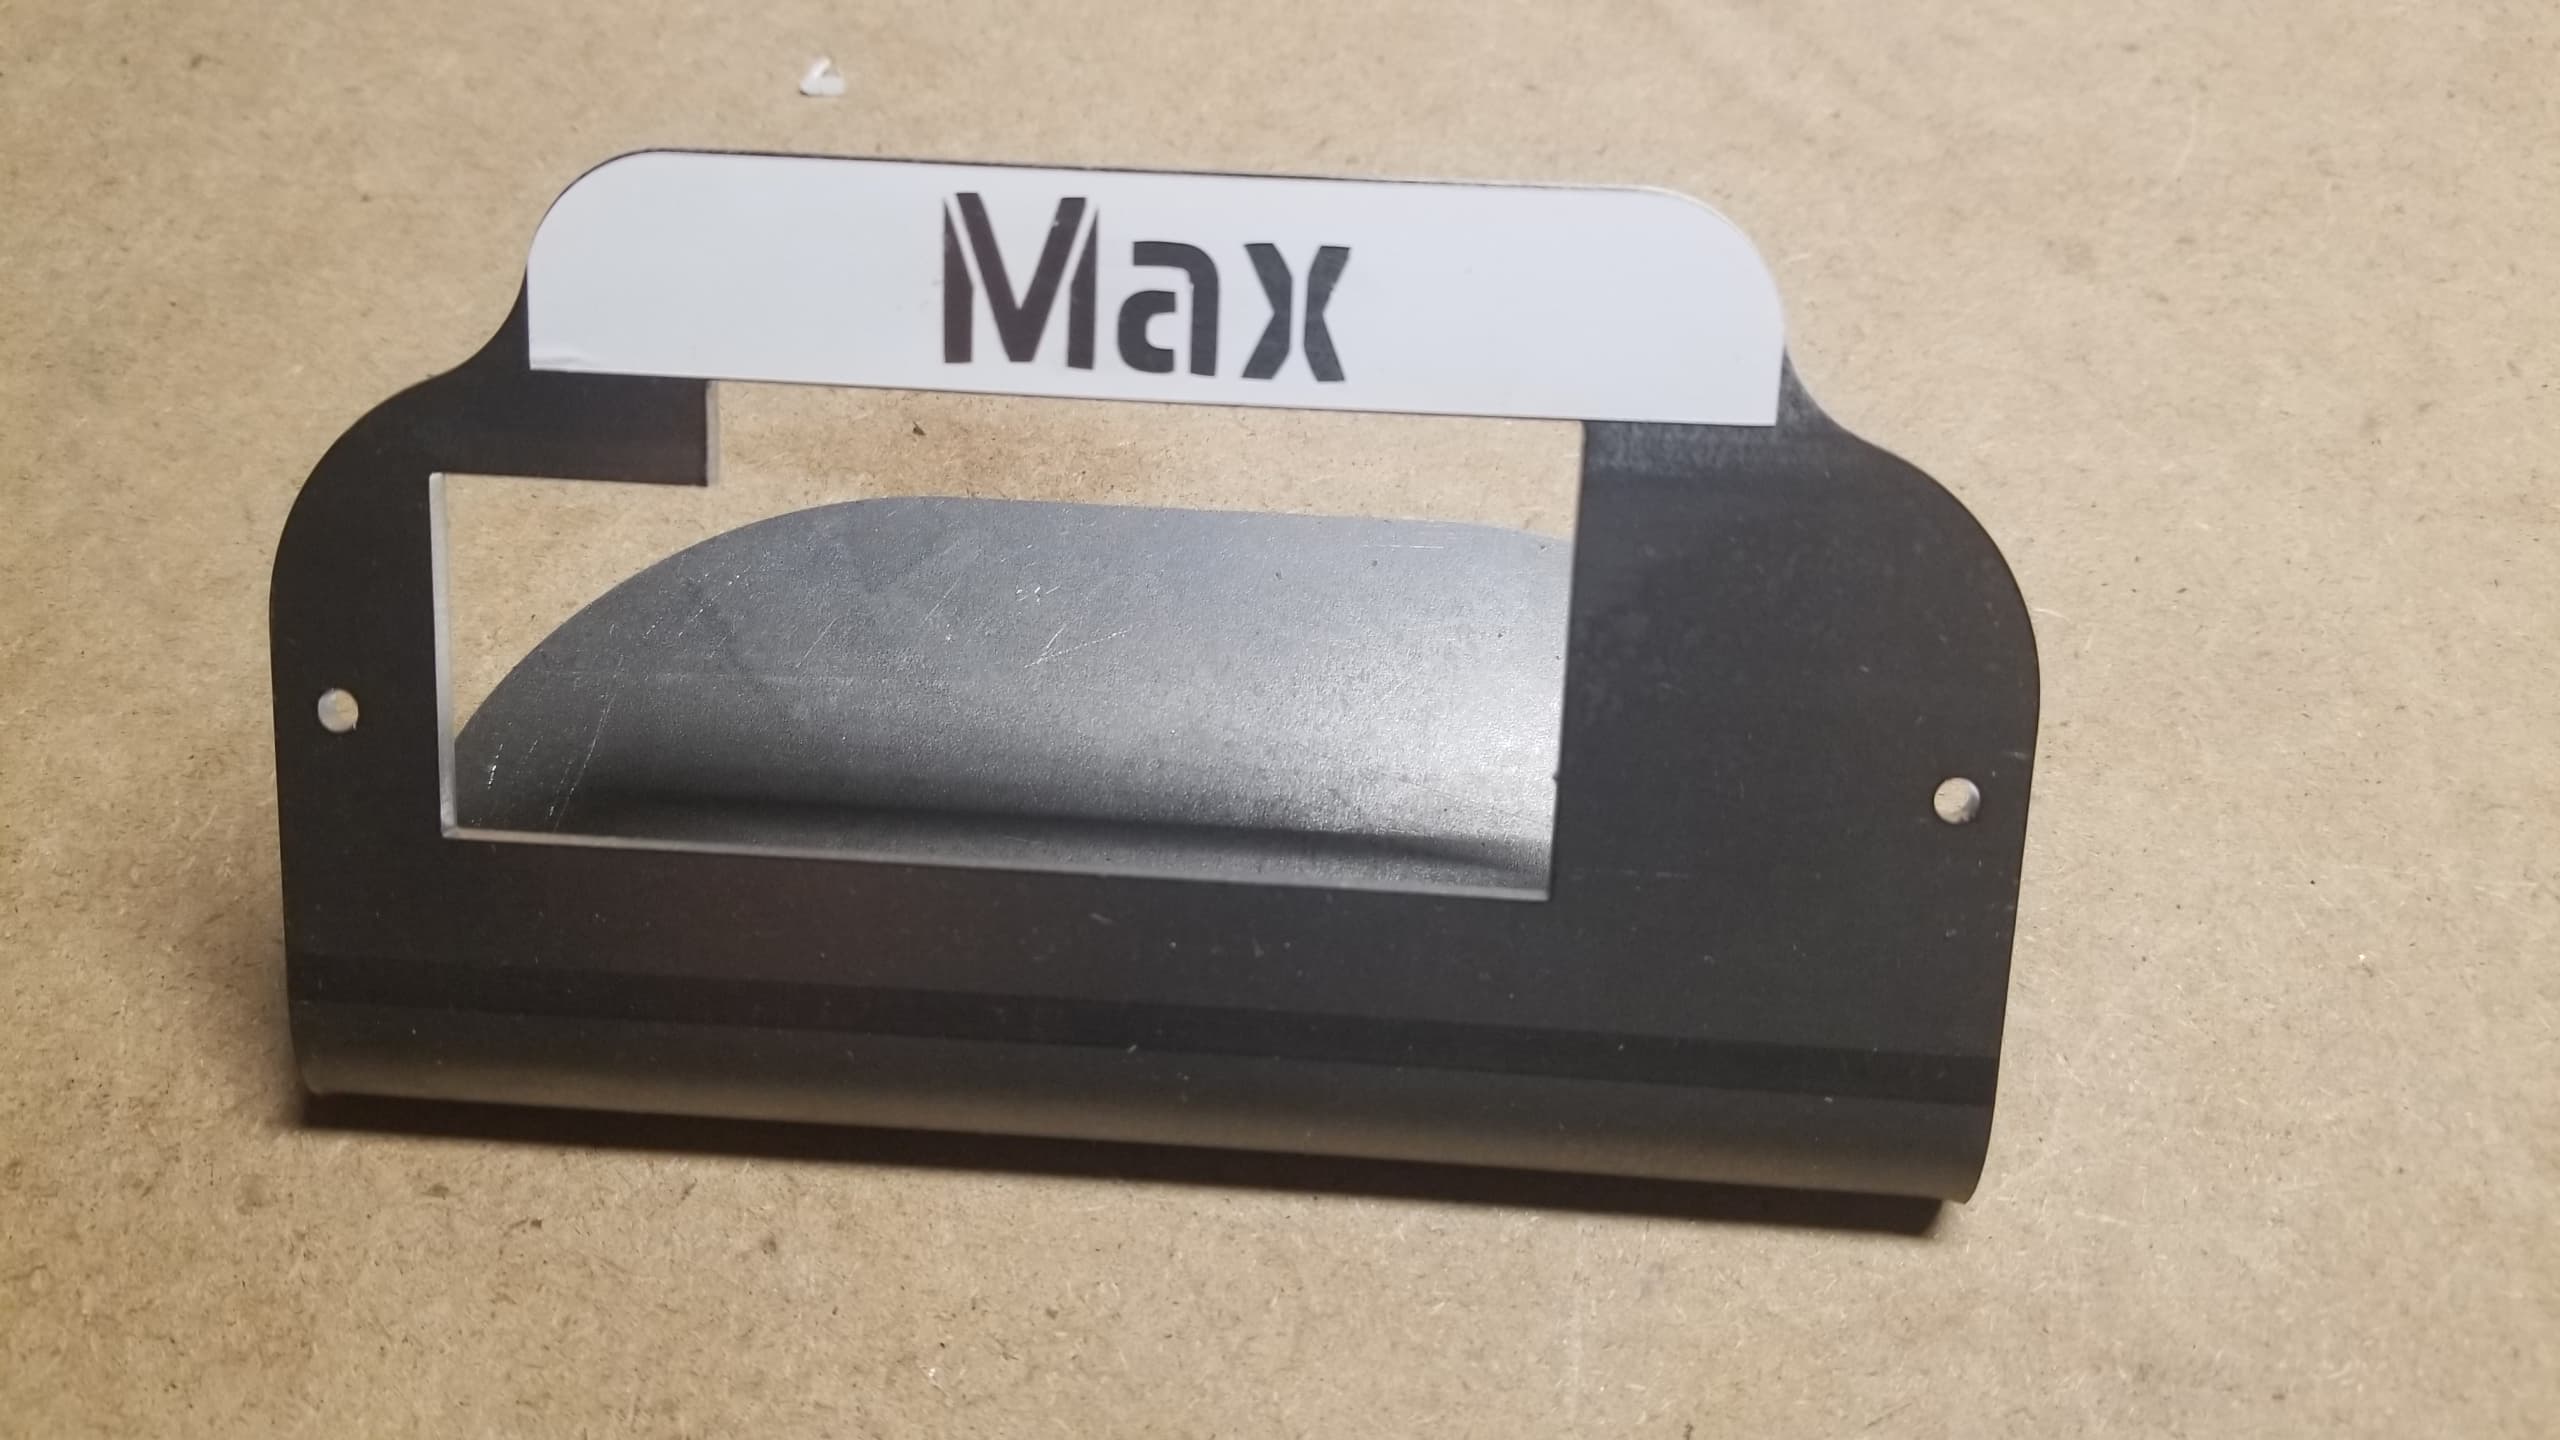
Adding another plastic keyboard/keypad type device to my desktop was not the route I wanted to go. Instead, there was something really appealing about having a hefty metal object on my desk. I though an angled panel would look slick as well as invite users to push the clicky buttons. I designed the stand as a simple shape that could be bent up to create the panel. Cutouts are made for the battery holder and microcontroller to stick out the back. The stand outline matches the PCB outline while also providing extra space on top to add personalized lettering.

Silkscreen
I purchased the happy and frustrated icons. This video was useful for learning how to import graphics into KiCAD.
Build
I got the stand cut and bent out of 0.1" (12 Ga.) A1008 steel using OSH Cut.
To add lettering to the stand, I first made stencils using a vinyl cutter. I then applied the stickers and etched the unmasked/exposed steel with q-tips, salt water and a 12V power supply (this youtube video explains the technique). Lastly, I blackened the etched letters using a bluing liquid.

bent steel stands
vinyl stencil applied before etching
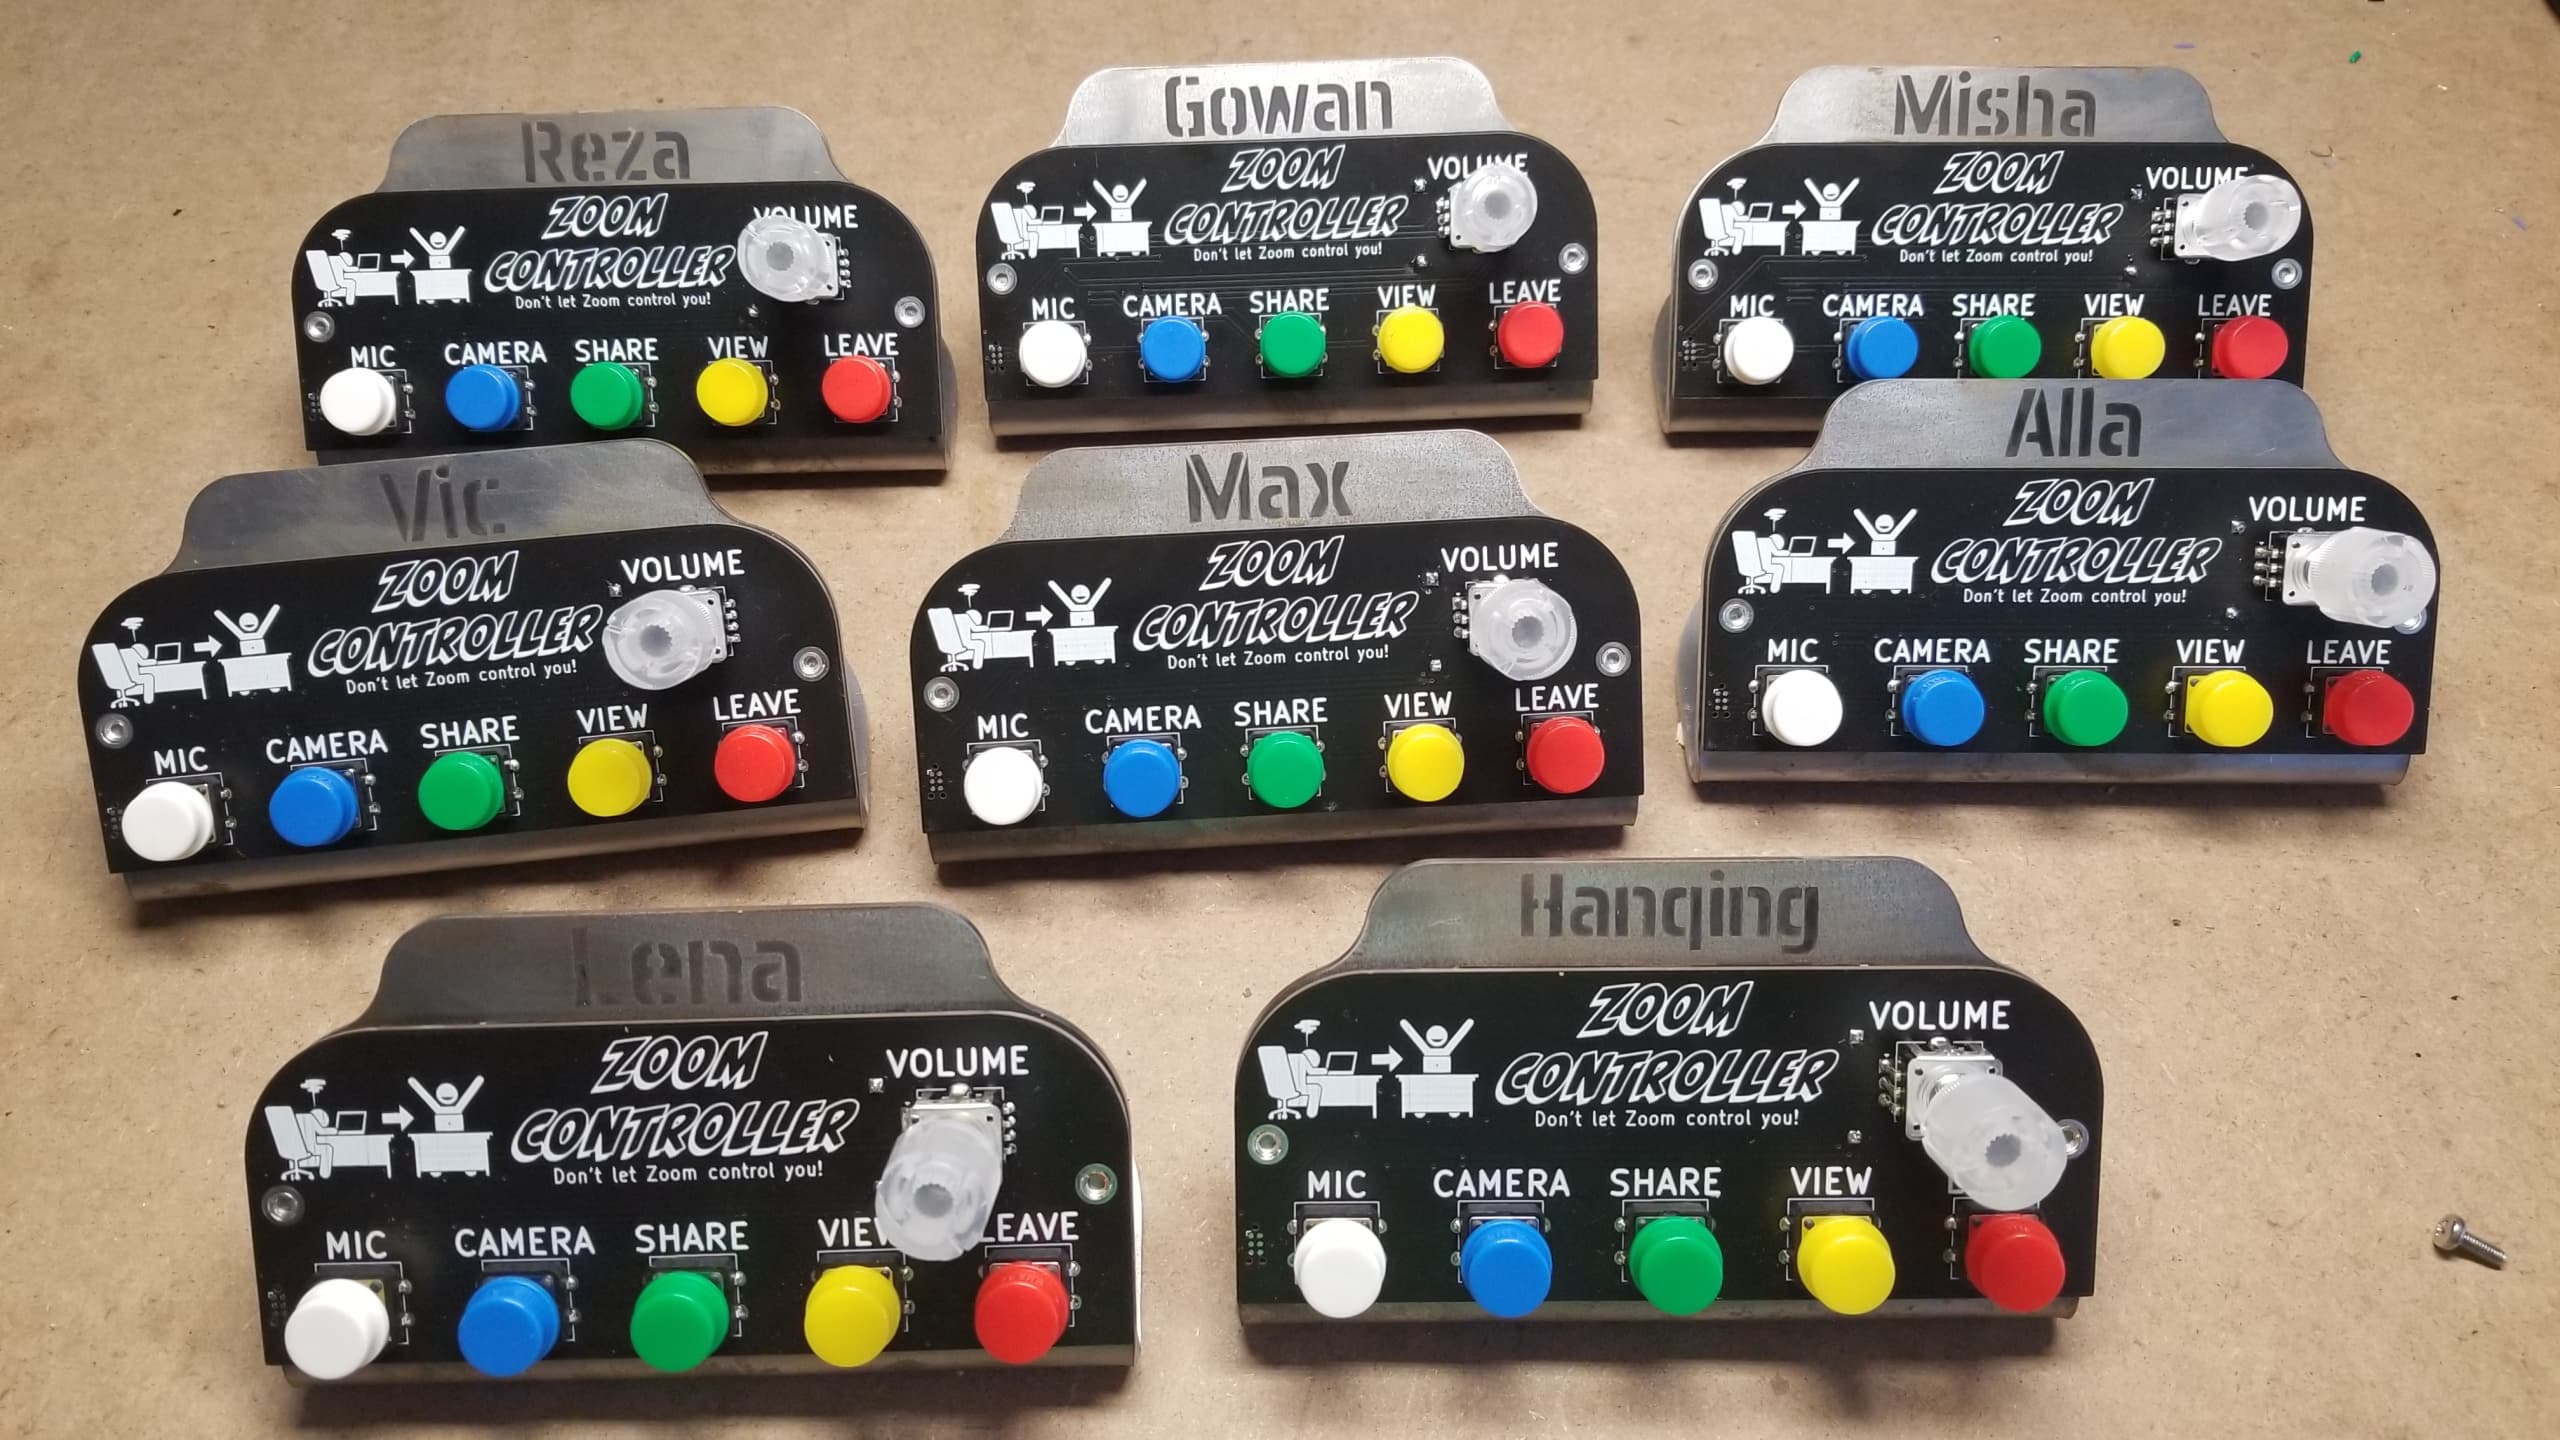
finished assemblies
Demo
- mentioned in hackaday article
← back to projects